Building a Red Team Lab - From Beginner to Advanced
Step-by-step guide to building your own penetration testing and red team lab environment for security practice and skill development.
Why Build a Red Team Lab?
A dedicated red team lab is the single best investment you can make in your cybersecurity career. It provides a safe, legal environment to practice offensive techniques, test exploits, develop custom tools, and understand how attacks work from both the attacker’s and defender’s perspectives.
Unlike online platforms that offer pre-built challenges, a personal lab gives you complete control over the environment. You decide which operating systems to run, which services to expose, and which vulnerabilities to introduce. This freedom lets you simulate realistic enterprise environments and practice the full attack lifecycle — from initial reconnaissance to post-exploitation and persistence.
Whether you’re preparing for certifications like OSCP, PNPT, or CRTO, or building practical skills for a security role, a home lab is where theory becomes muscle memory.
Hardware Requirements
You don’t need enterprise-grade hardware to get started. Here are recommended specifications for different experience levels:
Beginner Setup (Budget-Friendly)
- CPU: Any modern quad-core processor (Intel i5 / AMD Ryzen 5)
- RAM: 16 GB (minimum to run 3–4 VMs simultaneously)
- Storage: 256 GB SSD (NVMe preferred for faster VM performance)
- Network: Built-in Ethernet or USB adapter
- Estimated Cost: $0 if using existing hardware
Intermediate Setup
- CPU: 6–8 core processor (Intel i7 / AMD Ryzen 7)
- RAM: 32 GB
- Storage: 512 GB NVMe SSD + 1 TB HDD for VM archives
- Network: Dedicated USB WiFi adapter for wireless testing (e.g., Alfa AWUS036ACH)
- Estimated Cost: $200–$500 in upgrades
Advanced Setup (Dedicated Server)
- CPU: 8+ cores (AMD Ryzen 9 / Intel Xeon)
- RAM: 64 GB+
- Storage: 1 TB NVMe + 2 TB HDD RAID
- Network: Multiple NICs, managed switch for VLAN segmentation
- Optional: Raspberry Pi for physical attack simulation
- Estimated Cost: $800–$1,500
Hypervisor Selection and Setup
The hypervisor is the foundation of your lab. It manages all your virtual machines and controls their networking.
Option 1: VirtualBox (Free, Best for Beginners)
# Install VirtualBox on Ubuntu/Debian
sudo apt update && sudo apt install -y virtualbox virtualbox-ext-pack

# Create a host-only network for isolated lab traffic
VBoxManage hostonlyif create
VBoxManage hostonlyif ipconfig vboxnet0 --ip 192.168.56.1 --netmask 255.255.255.0

# Create a NAT Network for controlled internet access
VBoxManage natnetwork add --netname LabNAT --network "10.0.2.0/24" --enable --dhcp onPros: Free, cross-platform, easy to use, great snapshot support.
Cons: Performance overhead, limited nested virtualization, no native headless mode.
Option 2: VMware Workstation Pro (Best Performance)
VMware Workstation offers better performance, particularly for Windows VMs, and superior networking capabilities. It supports up to 32 vCPUs and 128 GB RAM per VM, which is critical for running resource-intensive tools.
Pros: Excellent performance, robust networking, professional-grade features.
Cons: Paid license (now free for personal use), primarily Windows/Linux host.
Option 3: Proxmox VE (Best for Dedicated Servers)
# After installing Proxmox on bare metal, access the web UI
# Default URL: https://<server-ip>:8006

# Create an internal network bridge for lab isolation
# In /etc/network/interfaces:
auto vmbr1
iface vmbr1 inet static
    address 10.10.10.1/24
    bridge-ports none
    bridge-stp off
    bridge-fd 0
    post-up echo 1 > /proc/sys/net/ipv4/ip_forward
post-up iptables -t nat -A POSTROUTING -s 10.10.10.0/24 -o vmbr0 -j MASQUERADEPros: Enterprise-grade, web interface, supports both KVM and LXC containers, free.
Cons: Requires dedicated hardware, steeper learning curve.
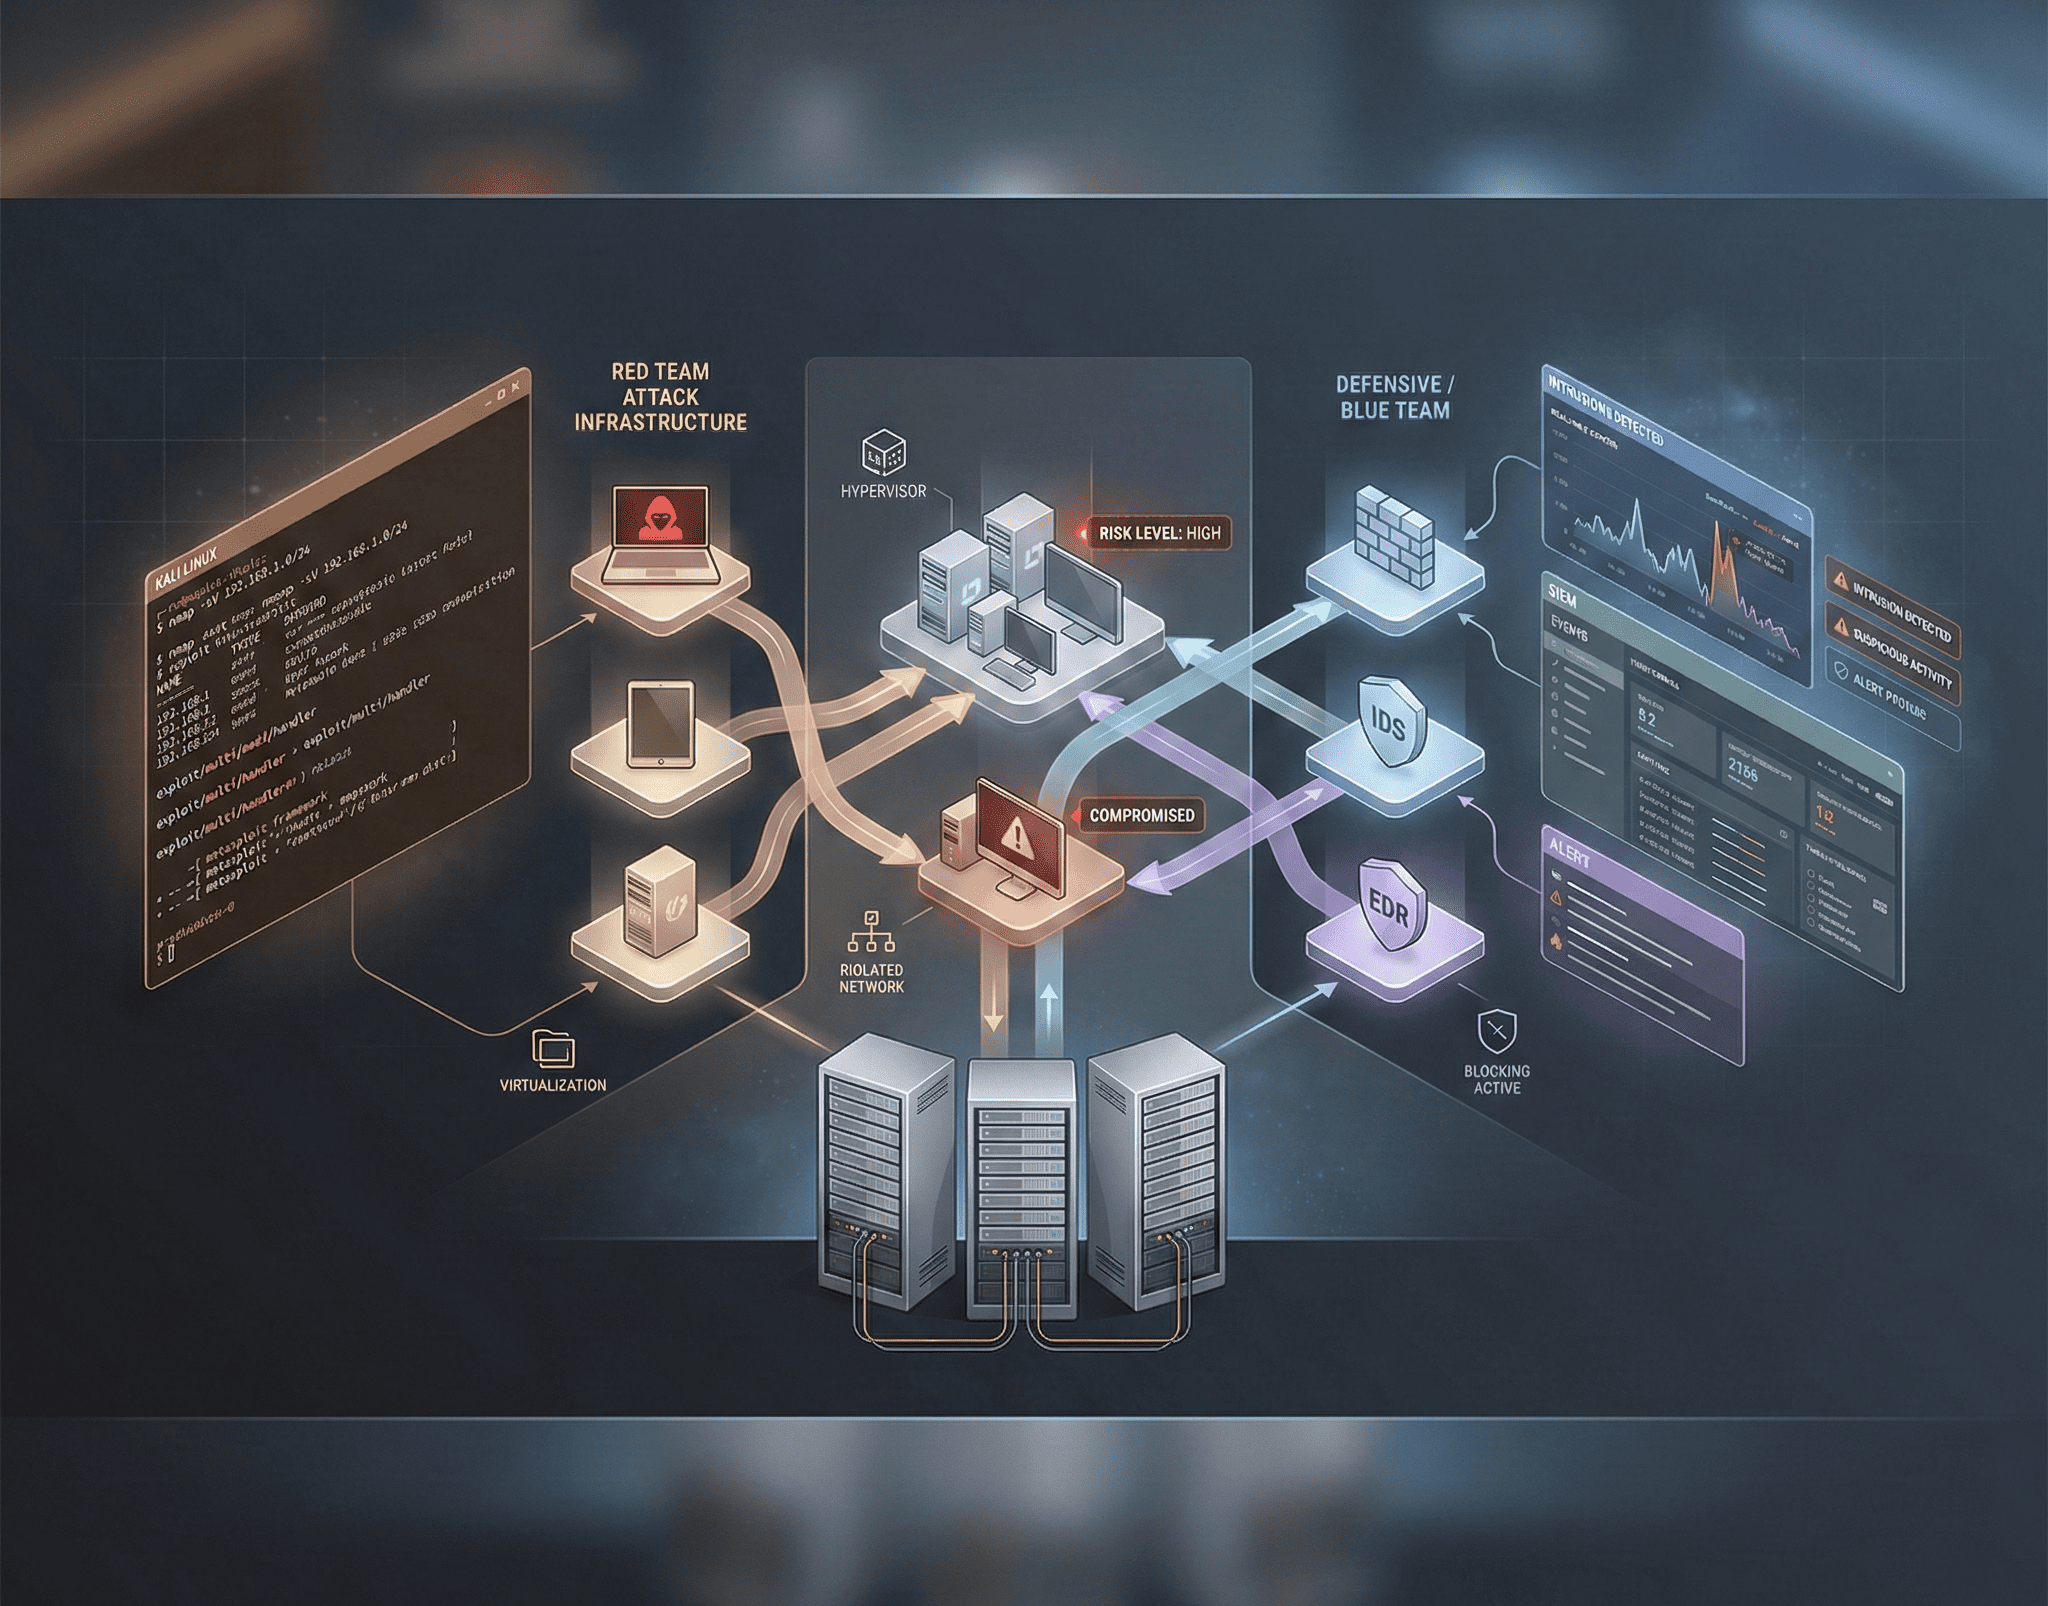
Building the Vulnerable Target Network
Intentionally Vulnerable Machines
These VMs serve as your practice targets. Each one teaches different exploitation techniques:
# Download and import Metasploitable 2
wget https://sourceforge.net/projects/metasploitable/files/Metasploitable2/metasploitable-linux-2.0.0.zip
unzip metasploitable-linux-2.0.0.zip

# Deploy DVWA (Damn Vulnerable Web Application) via Docker
docker run -d -p 8080:80 --name dvwa vulnerables/web-dvwa

# Set up a vulnerable Active Directory environment using DetectionLab
git clone https://github.com/clong/DetectionLab.git
cd DetectionLab/Vagrant
vagrant up| VM/Platform | Focus Area | Difficulty |
|---|---|---|
| DVWA | Web vulnerabilities (SQLi, XSS, CSRF) | Beginner |
| Metasploitable 2 | Network exploitation, service enumeration | Beginner |
| Metasploitable 3 | Modern services, Windows exploitation | Intermediate |
| VulnHub machines | Varied CTF-style challenges | Beginner–Advanced |
| HackTheBox / TryHackMe | Curated challenges with walkthroughs | All levels |
| DVWA + Juice Shop | Modern web app vulnerabilities, API attacks | Beginner–Intermediate |
| DetectionLab | Active Directory attacks, enterprise simulation | Advanced |
Vulnerable Active Directory Lab
Active Directory is the backbone of most enterprise networks and a prime target for attackers:
# Create a vulnerable AD forest with PowerShell
# On Windows Server 2019/2022 VM:
Install-WindowsFeature AD-Domain-Services -IncludeManagementTools
Install-ADDSForest -DomainName "lab.local" -SafeModeAdministratorPassword (ConvertTo-SecureString "P@ssw0rd!" -AsPlainText -Force)

# Add vulnerable configurations for practice
# Create a kerberoastable service account
New-ADUser -Name "svc_sql" -SamAccountName "svc_sql" -AccountPassword (ConvertTo-SecureString "Summer2024!" -AsPlainText -Force) -Enabled $true
Set-ADUser -Identity "svc_sql" -ServicePrincipalNames @{Add="MSSQLSvc/sql01.lab.local:1433"}

# Enable unconstrained delegation (vulnerable by design)
Set-ADComputer -Identity "WEB01" -TrustedForDelegation $true

# Create an AS-REP roastable user
Set-ADAccountControl -Identity "john.doe" -DoesNotRequirePreAuth $true
Offensive Tools Installation
Your attack machine is the hub of all offensive operations. Kali Linux is the most popular choice, but you can build a custom attack platform on any Linux distribution.
Essential Tools Checklist
# On Kali Linux, most tools are pre-installed. For custom setups:

# Network scanning and enumeration
sudo apt install -y nmap masscan netcat-traditional

# Web application testing
sudo apt install -y burpsuite zaproxy nikto dirb gobuster
pip3 install sqlmap

# Password attacks
sudo apt install -y hashcat john hydra

# Exploitation frameworks
sudo apt install -y metasploit-framework
go install github.com/projectdiscovery/nuclei/v3/cmd/nuclei@latest

# Post-exploitation and C2
sudo apt install -y empire powershell-empire
pip3 install impacket

# Wireless testing (requires compatible adapter)
sudo apt install -y aircrack-ng wifite reaver

# Custom wordlists
git clone https://github.com/danielmiessler/SecLists.git /opt/seclists
Organizing Your Toolkit
# Create a structured workspace
mkdir -p ~/redteam/{recon,exploit,post-exploit,loot,reports}

# Recon automation script
cat > ~/redteam/recon/quick_scan.sh << 'EOF'
#!/bin/bash
TARGET=$1
OUTDIR="$HOME/redteam/recon/$TARGET"
mkdir -p "$OUTDIR"

echo "[*] Starting reconnaissance on $TARGET"

# Port scan
echo "[*] Running Nmap scan..."
nmap -sV -sC -oA "$OUTDIR/nmap_scan" "$TARGET"

# Web enumeration (if port 80/443 is open)
echo "[*] Running directory brute-force..."
ffuf -u "http://$TARGET/FUZZ" -w /opt/seclists/Discovery/Web-Content/common.txt \
  -mc 200,301,302,403 -o "$OUTDIR/ffuf_results.json" -of json -s

echo "[+] Recon complete. Results saved to $OUTDIR"
EOF
chmod +x ~/redteam/recon/quick_scan.sh
Defensive Components
A well-rounded lab includes defensive tools so you can observe your attacks from the defender’s perspective:
pfSense Firewall
Deploy pfSense as a virtual router and firewall between your network segments. This lets you practice firewall evasion techniques and understand how network-level defenses work.
Wazuh SIEM
# Deploy Wazuh using Docker Compose
curl -sO https://packages.wazuh.com/4.7/docker/wazuh-docker.tar.gz
tar -xzf wazuh-docker.tar.gz
cd wazuh-docker
docker-compose -f generate-indexer-certs.yml run --rm generator
docker-compose up -d
# Access the dashboard at https://localhost:443
# Default credentials: admin / SecretPassword
Wazuh provides real-time log analysis, intrusion detection, file integrity monitoring, and compliance reporting. Watching your own attacks trigger alerts teaches you how to operate more stealthily and helps you understand detection engineering.
Network Architecture
┌─────────────────────────────────────────────────────────┐
│                    Host Machine                          │
│  ┌─────────┐  ┌──────────┐  ┌──────────────────────┐   │
│  │  Kali   │  │ pfSense  │  │   Target Network     │   │
│  │ Attack  │──│ Firewall │──│  ┌────────────────┐  │   │
│  │ Machine │  │  Router  │  │  │ Metasploitable │  │   │
│  └─────────┘  └──────────┘  │  │ DVWA / Juice   │  │   │
│       │            │        │  │ Windows AD Lab  │  │   │
│       │            │        │  └────────────────┘  │   │
│       │       ┌────────┐    │                      │   │
│       └───────│ Wazuh  │    └──────────────────────┘   │
│               │  SIEM  │                                │
│               └────────┘                                │
└─────────────────────────────────────────────────────────┘
Practice Scenarios
Once your lab is running, work through these progressively challenging scenarios:
- Beginner: Scan Metasploitable 2 with Nmap, identify vulnerable services, exploit them with Metasploit, and escalate privileges.
- Intermediate: Attack the DVWA web application through all difficulty levels. Practice SQL injection, XSS, file upload bypass, and command injection.
- Intermediate: Perform a full wireless assessment using your WiFi adapter — capture handshakes, crack WPA2, and set up a rogue access point.
- Advanced: Compromise the Active Directory lab using Kerberoasting, Pass-the-Hash, DCSync, and Golden Ticket attacks.
- Advanced: Build a custom C2 framework, establish persistence on a target, exfiltrate data, and evade detection from Wazuh.
Learning Resources
| Resource | Type | Cost |
|---|---|---|
| TryHackMe | Guided learning paths | Free / $10 mo |
| HackTheBox | Challenge-based labs | Free / $14 mo |
| VulnHub | Downloadable VMs | Free |
| PortSwigger Web Academy | Web security labs | Free |
| PentesterLab | Hands-on exercises | $20/mo |
| OSCP (OffSec) | Certification + lab | $1,599+ |
| TCM Security Academy | Video courses + certs | $30/mo |
Final Thoughts
Building a red team lab is a journey, not a destination. Start with the basics — a single attack machine and one vulnerable target — and expand as your skills grow. The key is consistent practice: spend time in your lab every day, even if it’s just 30 minutes. Document your attacks, write up your findings as if they were real pentest reports, and review what defenses could have stopped you.
Your lab will evolve with you. As you gain experience, you’ll add Active Directory forests, cloud-connected environments, and custom applications that mirror real-world enterprise networks. Every hour spent in your lab is an hour invested in becoming a better security professional.